
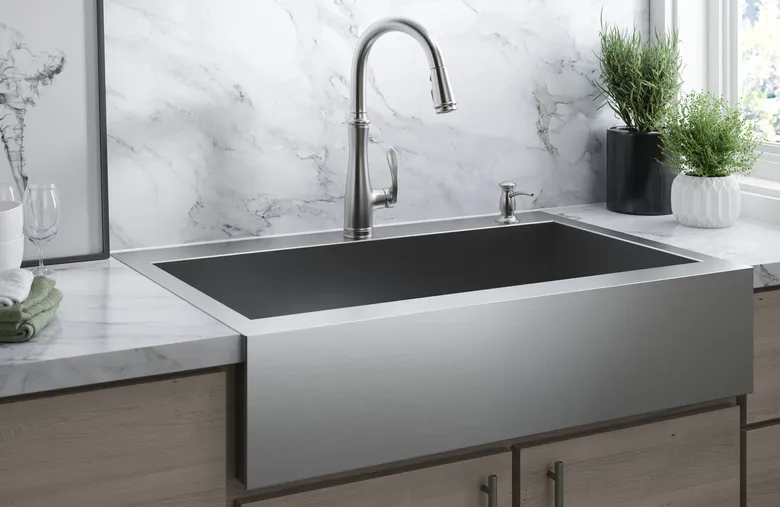
Replacing a kitchen sink is straightforward, but also a time-consuming task. There are sinks of all shapes, sizes and materials, some of which are trickier to work with than others. In this guide, we will tell you how to replace a kitchen sink. We’ve included the tasks of removing an old sink, cutting the counter for a new sink, changing pipes and fitting a kitchen sink for the first time. Call Mr.Drain Plumbing in Lafayette Ca to schedule an apointment today!

Table of Contents
How Long Does it Take to Replace a Kitchen Sink?
How to Remove a Kitchen Sink
How to Fit a Kitchen Sink
Cutting Your Countertop for the New Kitchen Sink
Replacing a Kitchen Sink Drain Pipe
How Much Does it Cost to Install a Kitchen Sink?
How Long Does it Take to Replace a Kitchen Sink?
On average, for a standard sink sized 80cm x 55cm x 20cm, it can take a professional installer between 1,5h and 2h. There are, however, several factors that come into play with this task at hand. For example, how easily the old sink is removed, how much work they need on the hole, and whether the pipes need to be replaced as well.
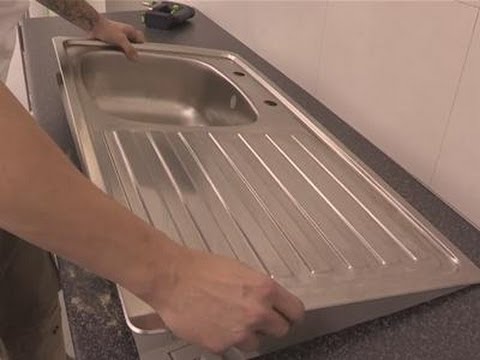
How to Remove a Kitchen Sink
The first step to replacing a kitchen sink is to remove the old one. This job needs to be handled gingerly, so you do not damage the countertop or the new sink. If you’re not 100% certain in your DIY plumbing skills, we advise you to get in touch with expert plumbing services professionals and have them change the sink.
Pro tip: Before you disconnect the pipes under the sink, take a photo, so you have it easier when you install the new unit.
Tools and Other Equipment You May Need
Adjustable wrench
Pliers
Screwdriver
Stanley knife or similar
A bucket and an old towel
Step 1. Fit your new sink and seal it in place
Turn over the top-mounting sink and apply caulk on the wider part. Then flip the sink and place it carefully in the hole. If there’s excess caulking, remove it.
Fitting an under-mount sink is the same, except that the caulk goes in a different place. With this type of sink, you add the caulk on top of the sink. Spread it evenly around the top and place the sink underneath the countertop. Use something for a base to support the sink while it glues.
Pro tip: We recommend that you use water-resistant silicone caulk for fitting a sink, regardless of the model.
Step 2. Attach the metal sink clips and fit your faucet
When the caulk is set, reattach the metal sink clips you removed from the previous sink. Again, place them underneath the sink and tighten well to fit the sink into place. Once you fit the sink, you may proceed with installing the tap.
Step 3. Seal and fasten the drain strainer
To install your new drain strainer, you may use plumber’s putty. Roll a small amount of it with your fingers to make it more malleable, then spread it evenly around the rim. Place the strainer and fasten the drain into place. If there’s excess putty, scrape it off with a cutting utensil.
Step 4. Reconnect your water supply lines
Reattach the hot and cold water supply lines to the new tap. Use metal connectors over each line and plug the faucet into the connector’s other end. To that, tighten the fastener with a wrench, but be careful not to over-work it.
Step 5. Install your garbage disposal unit and the dishwasher
If you’ve taken our advice and have taken a photo of every pipe before dismounting them, this step should be easy. If not, you can use the garbage disposal and dishwasher manuals to re-install them.
Installing the garbage disposal should be fairly simple. Most units are installed over the bottom of the drain and are held by a fastener. You should attach the dishwasher hose to a small spout on the pipes or the garbage disposal unit. Then hold it in place with a hose clamp.
Step 6. Connect the pipes and check for leaks
If you have installed a garbage disposal, the drainpipe for the sink should go on the side of the unit. If there’s no such unit, then the drainpipe runs from the drain to the main drain line. Connect the drain pipes easily via p-trap pipes. Fasten each pipe, but do not overdo it.
Once you complete this last installation step, turn on the water supply and test your work. Do not forget to place a bucket under the pipes and sink if any leaks occur.
Cutting Your Countertop for the New Kitchen Sink
Step 1. Mark your sink dimensions
First, take the measurements of the bottom of the sink. Mark the proper dimension with a graphite pencil and a ruler. Keep in mind that you shouldn’t take the measurements from the wider top side of the sink. The wider part lays on top of the kitchen counter and is used to glue down the sink.
Step 2. Drill corner holes and cut the countertop
Next, drill four holes at the four corners of your marking. For a round sink, drill the openings at opposite sides of the circle. Make sure the countertop has excellent support and use the jigsaw to cut it, starting from one of the holes you’ve made. You need a good base, so the countertop doesn’t break while trying to make an even cut. If you need any assistance with your kitchen installation projects, don’t hesitate to call a professional.
Step 3. Smooth down the surface
Use pliers or sandpaper to smoothen the cut surface. Do not get too into it because you may curve the cut. Wipe the dust after you’re done so you have a clean working space.
Replacing a Kitchen Sink Drain Pipe
If you have taken our advice on taking a photo of the pipes before dismounting them, replacing drain pipes under the sink will be a piece of cake.
The most common reasons for changing the pipe as well as the sink, are the following:
the existing drain pipe is too short for the new unit
or it’s too long for the new sink
if the pipe is old and dingy
lastly, if the pipe is broken and replacing it is unavoidable
How to Connect a Kitchen Sink Drain Pipe
Measure the length from the drain to the new sink, so you know how long you need it to be.
Buy or cut a pre-bought pipe to the exact measurements.
Place a washer over the end of the pipe.
Place slip nuts at both ends of the pipe or on which it’s necessary.
Put the drainpipe in place and screw the slip nut/s in.
Contact Mr.Drain Plumbing
For anyone looking for a professional plumbing company in Lafayette Ca, Mr.Drain Plumbing is the top choice. As your local hometown plumbers, the community knows they can trust us for any plumbing repair. We offer services in water heater installations and repairs, frozen pipe repairs, leak repairs, faucet repairs, drain cleaning, water softener installation, sewer and toilet repairs, garbage disposal repairs and replacements, pipe replacement, video pipe inspection, boiler installation, and backflow testing. As well as, 24/7 emergency plumbing in Lafayette.